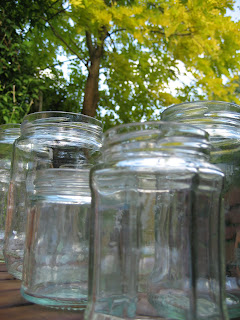
Okay, so I've been saving jars for months now for no known purpose other than I might use them for storage someday.... or something. The two bulging shopping bags of clanking glass even made the journey from our old flat in Coventry out to the country house and immediately lost rank among the boxes. The other day, while searching for a better place to store some left over cans of paint, I came across the clanking bags in the back of the garden shed and thought, oh yeah, The Jars. Struck by the image of some kind of jam jar lanterns I saw in a magazine once, I was hit by random inspiration. I headed down to the local craft shop, bought some of the cheapest plastic beads I could find, a bit of wire and string and headed home.
When I went back to the states last winter, I saw my sister using these crazy glue dots for scrapbooking and I thought they were amazing. So, I tried using them as a less fuss, no mess way to glue the beads to the jars and it actually seemed to work. I bought some of the dots labeled 'permanent', and aside from pulling on my skin a bit, the dots were really handy. A lot easier than a glue gun, and since they didn't need electricity, I could enjoy a rare sunny day in the garden.

One thing to point out if you're thinking of attempting this yourself, is how to secure the jar to the hanger. Here's what I did, but somebody please tell me if you have a better way to do this!! I measured the rim of the jar with the wire and then added a couple of inches. I made a circle with the wire and twisted the ends of the wire together until they wouldn't pull apart. Now that I had a circle I set about making some loops on either side to attach the hanging wire to. To do this, I wrapped the wire around a screwdriver and twisted until it made a loop. The tricky bit was to get the loop on the opposite side to be in about the same place so that when it was hung it would hang evenly. A few of them were a bit off, and hung a little off-kilter but I decided that just added character and wasn't too bothered about it at all. I used 20 gauge wire to hang them, and found that anything smaller was too flimsy to accept the weight of the jars.

As you can see I had all the essential gear at hand (note the pinot grigio)! I picked up a couple pairs of wire tools when I was at the shop. The obvious bit of kit was the wire cutters. But I also picked up two pairs of pliers, one with round tongs, the other with flat. The round tonged pliers were handy for making twists and spirals, while the flat ones were good for gripping and bending the ends of the wire. This is probably obvious to anyone who's ever worked with wire, but was graciously pointed out to my ignorance in the craft shop. In the end, I decided to use some old sequins and some mother of pearl buttons and hemp twine, as well as the beads, to good effect I think.


Now, I just need a nice warm night to string them out. Fingers crossed for one last summery night! ---The Queen Bee
1 comment:
Love your beaded jars! I'm in the process of painting jars for the same purpose. Did think about tissue paper but what if it rains? I'll use some beads I think now, inspired by your's! Not tried the hanging with wire bit yet - thanks for the tips!
Post a Comment